A while back, we had a real problem at work. Our field teams needed to run buffer analysis on uploaded shapefiles — but they had no access to ArcGIS Pro, and the GIS team was always swamped. The fix was clear: build a web tool they could use from a browser, no desktop software needed.
That one problem pushed us to build a full stack that combined Django on the backend, the ArcGIS API for Python for the analysis work, and a lightweight Leaflet.js map on the front end. The result was a tool that non-GIS users could actually use.
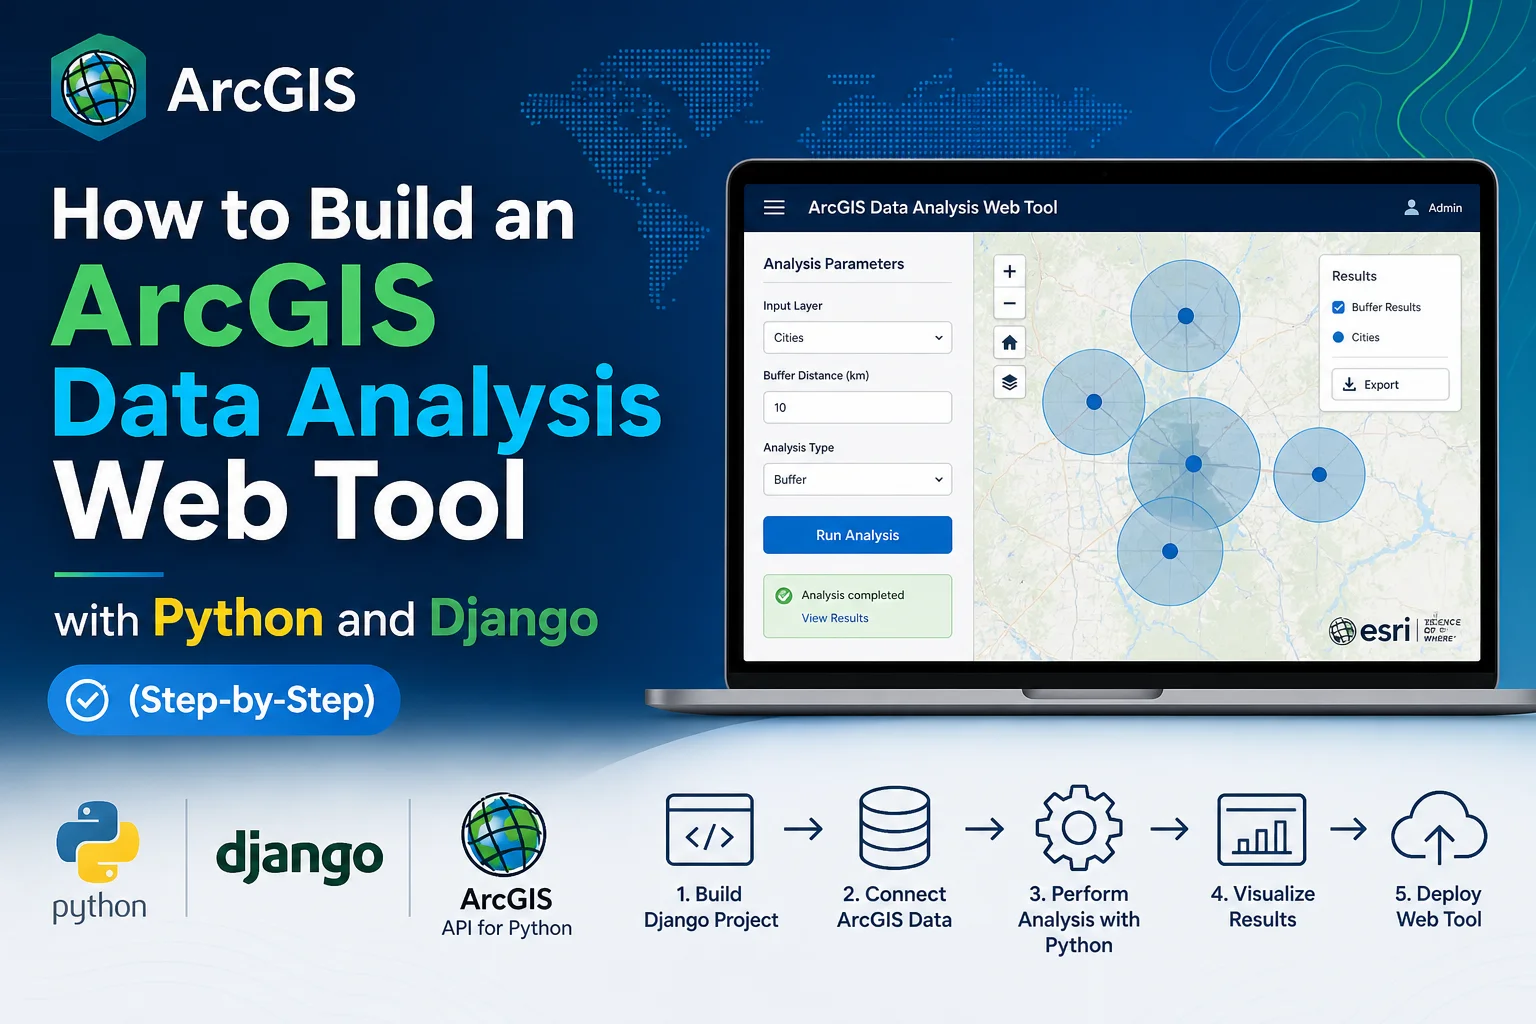
This tutorial walks you through building exactly that — from an empty folder to a working web app. We will cover Django project setup, connecting to ArcGIS Online, running real spatial analysis, storing results in PostGIS, and displaying them on a web map.
What this tutorial covers:
- Django + ArcGIS API for Python + GeoDjango + PostGIS
- Secure credential handling
- Spatial models and migrations
- Buffer analysis and overlay analysis using the ArcGIS Python library
- Rendering results on a Leaflet.js map
- Publishing layers back to ArcGIS Online
Prerequisites:
- Python 3.10 or newer
- An ArcGIS Online account or Enterprise portal (free Developer tier works)
- PostgreSQL with the PostGIS extension installed
- Basic comfort with Django
The working code referenced in this tutorial is available onGitHub. Real code exists — this is not a theoretical walkthrough.
1. Understanding the Architecture Before You Write a Single Line
Before jumping into code, let us be clear about what each piece does and how they connect.
Browser (Leaflet.js / ArcGIS JS SDK)
↕ HTTP / GeoJSON
Django Views & REST API (Django REST Framework)
↕ Python calls
ArcGIS API for Python
↕ HTTPS
ArcGIS Online / Enterprise Portal
↕
PostGIS (PostgreSQL) ← Stores raw data + analysis results
Django handles the request/response cycle, authentication, file uploads, and API routing. The ArcGIS API for Python talks to your Esri portal to run the analysis. PostGIS stores both your input data and the results. The front end reads GeoJSON from your Django API and renders it on a map.
ArcGIS API for Python vs. ArcGIS API for JavaScript — What Is the Difference?
This matters a lot, and most tutorials skip it entirely.
- ArcGIS API for Python runs on theserver side. Use it to connect to portals, search feature layers, run geoprocessing tools, publish data, and automate GIS workflows. This is thearcgis Python package.
- ArcGIS API for JavaScript runs in thebrowser. Use it to render interactive maps, display feature layers, handle map clicks, and build rich Esri-powered front ends.
In this tutorial we use both: Python handles all analysis work on the server, and the JavaScript SDK (or Leaflet.js as an alternative) handles map display.
ArcGIS Python API vs. Direct REST API Calls
The Python API is a wrapper around Esri’s REST services. For most analysis tasks, the Python API is cleaner and faster to write. But for simple read operations — like fetching a single feature layer’s metadata — rawrequests calls against the REST endpoint can be faster and lighter, since you skip the overhead of loading the full Python API library.
Cost and Account Notes
The free Esri Developer tier gives you access to ArcGIS Online and enough credits for development and testing. For production, you will need to understand the difference betweennamed users (licensed Esri users with their own login) andapp logins (OAuth 2.0 client credentials used in unattended scripts). App logins avoid per-user licensing costs for back-end analysis workflows. API key authentication is the simplest option for server-to-server calls, which is what we use here.
2. Setting Up Your Python Environment
Why You Need an Isolated Virtual Environment
Thearcgis package has heavy dependencies — GDAL, Shapely, numpy, and others. If you install it into your system Python, it will almost certainly conflict with something else. Always use an isolated environment.
Using venv (recommended for most setups):
# Linux / macOS
python3.10 -m venv arcgis_env
source arcgis_env/bin/activate
# Windows
python -m venv arcgis_env
arcgis_env\Scripts\activate
Using conda (if you already use it for data science work):
conda create -n arcgis_env python=3.10
conda activate arcgis_env
Known issue: On Windows,pip install arcgis sometimes fails because of GDAL wheel mismatches. If it does, install GDAL via conda first (conda install -c conda-forge gdal), then install thearcgis package on top. On Linux (Ubuntu), GDAL is usually available viaapt:
sudo apt-get install gdal-bin libgdal-dev
Installing All Dependencies
Create arequirements.txt in your project root. Pin your versions — the ArcGIS API has made breaking changes between minor releases, and you do not want your analysis code to break after an upgrade.
Django==4.2.13
arcgis==2.3.0
psycopg2-binary==2.9.9
djangorestframework==3.15.1
django-cors-headers==4.3.1
djangorestframework-gis==1.0
python-decouple==3.8
celery==5.3.6
redis==5.0.4
Install everything:
pip install -r requirements.txt
Setting Up PostGIS
PostGIS must be enabled as a PostgreSQL extension. Log in to your PostgreSQL instance and run:
CREATE DATABASE arcgis_tool;
\c arcgis_tool
CREATE EXTENSION postgis;
— Verify it worked
SELECT PostGIS_version();
If theCREATE EXTENSION command fails, it usually means the PostGIS package is not installed at the OS level, or the version of PostGIS does not match your PostgreSQL version. On Ubuntu:
sudo apt-get install postgresql-15-postgis-3
Replace15 with your actual PostgreSQL version. After installing, restart PostgreSQL and try again.
3. Starting the Django Project and Configuring GeoDjango
Create the Project
django-admin startproject arcgis_tool .
python manage.py startapp analysis
Your folder structure should look like this:
arcgis_tool/
├── arcgis_tool/
│ ├── __init__.py
│ ├── settings.py
│ ├── urls.py
│ └── wsgi.py
├── analysis/
│ ├── models.py
│ ├── views.py
│ ├── services.py ← we will create this
│ └── urls.py
├── requirements.txt
├── .env
└── manage.py
Configure settings.py
This is where most people get stuck. Here is the full block you need:
# settings.py
INSTALLED_APPS = [
‘django.contrib.admin’,
‘django.contrib.auth’,
‘django.contrib.contenttypes’,
‘django.contrib.sessions’,
‘django.contrib.messages’,
‘django.contrib.staticfiles’,
‘django.contrib.gis’, # ← Required for GeoDjango
‘rest_framework’,
‘rest_framework_gis’,
‘corsheaders’,
‘analysis’,
]
MIDDLEWARE = [
‘corsheaders.middleware.CorsMiddleware’, # ← Must be first
‘django.middleware.security.SecurityMiddleware’,
# … rest of middleware
]
DATABASES = {
‘default’: {
‘ENGINE’: ‘django.contrib.gis.db.backends.postgis’,
‘NAME’: config(‘DB_NAME’, default=’arcgis_tool’),
‘USER’: config(‘DB_USER’, default=’postgres’),
‘PASSWORD’: config(‘DB_PASSWORD’),
‘HOST’: config(‘DB_HOST’, default=’localhost’),
‘PORT’: config(‘DB_PORT’, default=’5432′),
}
}
CORS_ALLOWED_ORIGINS = [
“http://localhost:3000”,
“http://127.0.0.1:8000”,
]
If you forgetdjango.contrib.gis: Your spatial models will import fine butmakemigrations will silently create non-spatial fields. You will only notice when you try to run spatial queries and they fail. Always check yourINSTALLED_APPS first when spatial queries break.
GDAL and GEOS Paths (Windows and Docker)
On Windows and inside Docker containers, Django’s GeoDjango often cannot find GDAL and GEOS automatically. Add these lines tosettings.py when running on Windows:
import os
if os.name == ‘nt’: # Windows only
GDAL_LIBRARY_PATH = r’C:\OSGeo4W\bin\gdal308.dll’
GEOS_LIBRARY_PATH = r’C:\OSGeo4W\bin\geos_c.dll’
On Docker with a Debian base image, GDAL is usually found automatically. But Alpine images are a problem — see the deployment section for details.
Storing ArcGIS Credentials Securely
Never hardcode your ArcGIS credentials insettings.py or any source file. We usepython-decouple to load them from a.env file.
Create a.env file in your project root:
DB_NAME=arcgis_tool
DB_USER=postgres
DB_PASSWORD=your_postgres_password
DB_HOST=localhost
DB_PORT=5432
ARCGIS_URL=https://www.arcgis.com
ARCGIS_API_KEY=your_api_key_here
Add.env to your.gitignore immediately.
Insettings.py, load these values:
from decouple import config
ARCGIS_URL = config(‘ARCGIS_URL’, default=’https://www.arcgis.com’)
ARCGIS_API_KEY = config(‘ARCGIS_API_KEY’)
API key vs. username/password: For unattended server-to-server calls, API keys are the better choice. They do not expire mid-session the way token-based username/password auth can, and they do not require storing a user password on the server. You generate them in ArcGIS Online under your developer settings.
Test Your ArcGIS Connection Early
Before you build anything else, confirm the connection works. Open the Django shell:
python manage.py shell
Then run:
from arcgis.gis import GIS
from django.conf import settings
try:
gis = GIS(settings.ARCGIS_URL, api_key=settings.ARCGIS_API_KEY)
print(f”Connected as: {gis.properties.user}”)
except Exception as e:
print(f”Connection failed: {e}”)
If you see aTokenExpiredError, your API key has not been configured correctly. If you seeAGOLERROR_OBJECT_DOES_NOT_EXIST, double-check your portal URL — the trailing slash matters.
4. Building Spatial Models with GeoDjango
Defining the Model
# analysis/models.py
from django.contrib.gis.db import models
class AnalysisLayer(models.Model):
name = models.CharField(max_length=255)
description = models.TextField(blank=True)
# Spatial fields
point_location = models.PointField(srid=4326, null=True, blank=True)
boundary = models.PolygonField(srid=4326, null=True, blank=True)
geometry = models.GeometryField(srid=4326, null=True, blank=True)
# Metadata
source_layer_id = models.CharField(max_length=255, blank=True)
analysis_type = models.CharField(max_length=100, blank=True)
created_at = models.DateTimeField(auto_now_add=True)
updated_at = models.DateTimeField(auto_now=True)
class Meta:
indexes = [
models.Index(fields=[‘analysis_type’]),
]
def __str__(self):
return self.name
class BufferResult(models.Model):
source_layer = models.ForeignKey(AnalysisLayer, on_delete=models.CASCADE)
buffer_distance_meters = models.FloatField()
result_geometry = models.MultiPolygonField(srid=4326)
arcgis_job_id = models.CharField(max_length=255, blank=True)
created_at = models.DateTimeField(auto_now_add=True)
Field type notes:
- UsePointField for single location data (GPS coordinates, facility locations)
- UsePolygonField for area data (parcels, districts, zones)
- UseGeometryField when you do not know the geometry type in advance — it accepts any geometry but is harder to query efficiently
- srid=4326 is WGS 84 — the standard for GPS data and most web services. Usesrid=3857 (Web Mercator) only if you need precise distance calculations at local scale, since 4326 distorts distances at mid-latitudes
Running and Validating Migrations
python manage.py makemigrations
python manage.py migrate
PostGIS-backed migrations are different from regular Django migrations. They create geometry columns in PostgreSQL with proper GIST spatial indexes. Verify in PostgreSQL:
SELECT f_table_name, f_geometry_column, coord_dimension, srid, type
FROM geometry_columns
WHERE f_table_name LIKE ‘analysis_%’;
You should see your tables listed with their geometry types and SRIDs.
Common Migration Errors
- “django.core.exceptions.ImproperlyConfigured: Could not find the GDAL library” — Your GDAL install is missing or the path is wrong. On Ubuntu:sudo apt-get install gdal-bin. On Windows: checkGDAL_LIBRARY_PATH in settings.
- “ProgrammingError: type ‘geometry’ does not exist” — PostGIS extension is not installed. RunCREATE EXTENSION postgis; in psql.
- “ERROR: column ‘id’ does not exist” — You ranmigrate withoutmakemigrations first. Always runmakemigrations first, thenmigrate.
5. Connecting to ArcGIS and Running Spatial Analysis
The ArcGIS Service Layer
Never put ArcGIS connection code directly in views. Put it in aservices.py file. This keeps your business logic separate and makes testing much easier.
# analysis/services.py
from arcgis.gis import GIS
from arcgis.features import FeatureLayerCollection
from arcgis.features.use_proximity import create_buffers
import json
from django.conf import settings
from django.core.cache import cache
def get_gis_connection():
“””
Returns a cached GIS connection to avoid re-authenticating on every request.
Cache expires after 50 minutes (tokens last 60 min by default).
“””
gis = cache.get(‘arcgis_gis_connection’)
if gis is None:
try:
gis = GIS(
url=settings.ARCGIS_URL,
api_key=settings.ARCGIS_API_KEY
)
cache.set(‘arcgis_gis_connection’, gis, timeout=3000)
except Exception as e:
raise ConnectionError(f”Failed to connect to ArcGIS: {str(e)}”)
return gis
def search_feature_layers(search_query: str, owner: str = None, tag: str = None):
“””
Search the portal for feature layers matching a query.
“””
gis = get_gis_connection()
query = search_query
if owner:
query += f” owner:{owner}”
if tag:
query += f” tags:{tag}”
results = gis.content.search(
query=query,
item_type=”Feature Layer”,
max_items=20
)
return results
def run_buffer_analysis(feature_layer_item, distance_meters: float):
“””
Run buffer analysis on a feature layer using the ArcGIS Python library.
Returns a FeatureSet with the buffered geometries.
“””
gis = get_gis_connection()
try:
result = create_buffers(
input_layer=feature_layer_item,
distances=[distance_meters],
distance_unit=”Meters”,
output_name=f”buffer_{int(distance_meters)}m”,
context={“outSR”: {“wkid”: 4326}},
gis=gis
)
return result
except Exception as e:
raise RuntimeError(f”Buffer analysis failed: {str(e)}”)
def featureset_to_geojson(feature_set):
“””
Convert an ArcGIS FeatureSet to a GeoJSON dict for use in Django.
“””
return feature_set.to_geojson
def save_analysis_result_to_db(feature_set, source_layer, buffer_distance):
“””
Convert ArcGIS FeatureSet → GeoJSON → GeoDjango model.
Full round-trip example.
“””
from django.contrib.gis.geos import GEOSGeometry
from .models import BufferResult
geojson_str = featureset_to_geojson(feature_set)
geojson = json.loads(geojson_str)
for feature in geojson[‘features’]:
geom_str = json.dumps(feature[‘geometry’])
geom = GEOSGeometry(geom_str, srid=4326)
BufferResult.objects.create(
source_layer=source_layer,
buffer_distance_meters=buffer_distance,
result_geometry=geom
)
Handling Async Analysis Jobs
Some ArcGIS geoprocessing tools are asynchronous — they return a job ID and you poll for the result. Here is the polling pattern:
import time
def poll_geoprocessing_job(gp_job, max_wait_seconds=120):
“””
Poll an async ArcGIS geoprocessing job until complete.
“””
start = time.time()
while True:
status = gp_job.status
if status == “esriJobSucceeded”:
return gp_job.outputs
elif status in (“esriJobFailed”, “esriJobCancelled”):
raise RuntimeError(f”Geoprocessing job failed: {gp_job.messages}”)
elif time.time() – start > max_wait_seconds:
raise TimeoutError(“Geoprocessing job timed out”)
time.sleep(3)
For long-running jobs (anything over 10–15 seconds), do not run them in a synchronous Django view. Use Celery instead — see the performance section below.
6. Building Django Views and URL Routing
Class-Based Views vs. Function-Based Views
For this use case, we recommend class-based views (CBVs). The main reason is that analysis endpoints typically handle multiple HTTP methods differently — GET returns results, POST triggers analysis, DELETE removes a layer. CBVs make that separation clean and explicit.
# analysis/views.py
from rest_framework.views import APIView
from rest_framework.response import Response
from rest_framework import status
from rest_framework.parsers import MultiPartParser, JSONParser
from django.contrib.gis.geos import GEOSGeometry
import json
from .models import AnalysisLayer, BufferResult
from .services import run_buffer_analysis, save_analysis_result_to_db, search_feature_layers
from .serializers import AnalysisLayerSerializer, BufferResultGeoSerializer
class BufferAnalysisView(APIView):
parser_classes = [MultiPartParser, JSONParser]
def post(self, request):
“””
Accept a feature layer item ID and buffer distance.
Trigger buffer analysis and return GeoJSON results.
“””
layer_id = request.data.get(‘layer_id’)
distance = float(request.data.get(‘distance_meters’, 500))
if not layer_id:
return Response(
{‘error’: ‘layer_id is required’},
status=status.HTTP_400_BAD_REQUEST
)
try:
from arcgis.gis import GIS
from django.conf import settings
gis = GIS(settings.ARCGIS_URL, api_key=settings.ARCGIS_API_KEY)
layer_item = gis.content.get(layer_id)
result_feature_set = run_buffer_analysis(layer_item, distance)
geojson = result_feature_set.to_geojson
return Response(json.loads(geojson), status=status.HTTP_200_OK)
except RuntimeError as e:
return Response({‘error’: str(e)}, status=status.HTTP_500_INTERNAL_SERVER_ERROR)
def get(self, request):
“””Return stored buffer results as GeoJSON.”””
results = BufferResult.objects.all().order_by(‘-created_at’)[:20]
serializer = BufferResultGeoSerializer(results, many=True)
return Response(serializer.data)
class LayerSearchView(APIView):
def get(self, request):
query = request.query_params.get(‘q’, ”)
owner = request.query_params.get(‘owner’)
tag = request.query_params.get(‘tag’)
layers = search_feature_layers(query, owner=owner, tag=tag)
data = [
{‘id’: item.id, ‘title’: item.title, ‘type’: item.type}
for item in layers
]
return Response(data)
Serializers for Spatial Data
# analysis/serializers.py
from rest_framework_gis.serializers import GeoFeatureModelSerializer
from rest_framework import serializers
from .models import AnalysisLayer, BufferResult
class AnalysisLayerSerializer(GeoFeatureModelSerializer):
class Meta:
model = AnalysisLayer
geo_field = ‘geometry’
fields = [‘id’, ‘name’, ‘description’, ‘analysis_type’, ‘created_at’]
class BufferResultGeoSerializer(GeoFeatureModelSerializer):
class Meta:
model = BufferResult
geo_field = ‘result_geometry’
fields = [‘id’, ‘buffer_distance_meters’, ‘created_at’]
URL Routing
# analysis/urls.py
from django.urls import path
from . import views
urlpatterns = [
path(‘buffer/’, views.BufferAnalysisView.as_view(), name=’buffer-analysis’),
path(‘layers/search/’, views.LayerSearchView.as_view(), name=’layer-search’),
]
# arcgis_tool/urls.py
from django.urls import path, include
urlpatterns = [
path(‘api/analysis/’, include(‘analysis.urls’)),
]
7. Rendering Results on a Web Map
Using Leaflet.js
Leaflet.js is our first choice for displaying analysis results. It is lightweight, does not require an Esri account for rendering, and works perfectly with GeoJSON from our Django API. For most field tool use cases, it is all you need.
Here is a complete Django template that loads analysis results and displays them on a Leaflet map:
<!– templates/analysis/map.html –>
<!DOCTYPE html>
<html>
<head>
<title>ArcGIS Analysis Results</title>
<link rel=”stylesheet” href=”https://unpkg.com/leaflet@1.9.4/dist/leaflet.css” />
<style>
#map { height: 600px; width: 100%; }
.controls { padding: 10px; background: #f5f5f5; }
</style>
</head>
<body>
<div class=”controls”>
<button onclick=”toggleLayer(‘original’)”>Toggle Original Layer</button>
<button onclick=”toggleLayer(‘buffer’)”>Toggle Buffer Results</button>
</div>
<div id=”map”></div>
<script src=”https://unpkg.com/leaflet@1.9.4/dist/leaflet.js”></script>
<script>
const map = L.map(‘map’).setView([35.0, -106.0], 10);
L.tileLayer(‘https://{s}.tile.openstreetmap.org/{z}/{x}/{y}.png’, {
attribution: ‘© OpenStreetMap contributors’
}).addTo(map);
let bufferLayer = null;
const layers = {};
// Load buffer results from our Django API
fetch(‘/api/analysis/buffer/’)
.then(response => response.json())
.then(geojson => {
bufferLayer = L.geoJSON(geojson, {
style: {
color: ‘#ff7800’,
weight: 2,
fillOpacity: 0.3
},
onEachFeature: function(feature, layer) {
layer.bindPopup(
`Buffer Distance: ${feature.properties.buffer_distance_meters}m`
);
}
}).addTo(map);
layers[‘buffer’] = bufferLayer;
if (bufferLayer.getBounds().isValid()) {
map.fitBounds(bufferLayer.getBounds());
}
})
.catch(err => console.error(‘Failed to load results:’, err));
function toggleLayer(name) {
const layer = layers[name];
if (!layer) return;
if (map.hasLayer(layer)) {
map.removeLayer(layer);
} else {
map.addLayer(layer);
}
}
</script>
</body>
</html>
When to Use the ArcGIS Maps SDK for JavaScript Instead
Leaflet.js is enough for most analysis result display. But switch to the ArcGIS Maps SDK for JavaScript when you need:
- Esri basemaps (streets, imagery, topographic)
- Feature layer popups with Esri styling
- Direct access to portal layers without exporting to GeoJSON
- Editing capabilities — the JS SDK has native feature editing
Basic ArcGIS JS SDK integration in a Django template:
<link rel=”stylesheet” href=”https://js.arcgis.com/4.29/esri/themes/light/main.css”>
<script src=”https://js.arcgis.com/4.29/”></script>
<div id=”viewDiv” style=”height:600px;”></div>
<script>
require([
“esri/Map”,
“esri/views/MapView”,
“esri/layers/GeoJSONLayer”
], function(Map, MapView, GeoJSONLayer) {
const map = new Map({ basemap: “streets-navigation-vector” });
const view = new MapView({
container: “viewDiv”,
map: map,
center: [-106.0, 35.0],
zoom: 10
});
const bufferLayer = new GeoJSONLayer({
url: “/api/analysis/buffer/”
});
map.add(bufferLayer);
});
</script>
8. Publishing Results Back to ArcGIS Online and Calling Geoprocessing Tools
Publishing a Feature Layer from Django
When you want to push your analysis results back to ArcGIS Online — for example, to share them with team members who use ArcGIS Pro or Survey123 — useFeatureLayerCollection.manager.overwrite().
# In services.py
import geopandas as gpd
import json
from arcgis.features import FeatureLayerCollection
from .models import BufferResult
def publish_results_to_portal(layer_item_id: str):
“””
Convert stored QuerySet results to GeoDataFrame and overwrite an existing portal layer.
“””
gis = get_gis_connection()
# Step 1: Get results from PostGIS
results = BufferResult.objects.all()
# Step 2: Convert to GeoDataFrame
data = []
for r in results:
data.append({
‘geometry’: r.result_geometry.geojson,
‘buffer_distance’: r.buffer_distance_meters,
‘created_at’: str(r.created_at)
})
gdf = gpd.GeoDataFrame(
data,
geometry=gpd.GeoSeries.from_wkt([r.result_geometry.wkt for r in results]),
crs=”EPSG:4326″
)
# Step 3: Export to GeoJSON
geojson_path = ‘/tmp/buffer_results.geojson’
gdf.to_file(geojson_path, driver=’GeoJSON’)
# Step 4: Overwrite existing layer
layer_item = gis.content.get(layer_item_id)
flc = FeatureLayerCollection.fromitem(layer_item)
result = flc.manager.overwrite(geojson_path)
return result
Rate limits: ArcGIS Online enforces rate limits on publishing and analysis operations. If you hit them, you will see a429 response or aServiceUnavailableError. For batch publishing, add exponential backoff and retry logic.
Calling ArcGIS Geoprocessing Tools via the REST API
Sometimes the Python API wrapper is slower than calling the REST endpoint directly. For simple, synchronous geoprocessing operations, rawrequests calls can be 30–50% faster.
import requests
from django.conf import settings
def call_gp_tool_direct(service_url: str, params: dict):
“””
Call a geoprocessing tool directly via the REST API.
Use this when the Python API overhead is not worth it.
“””
token_response = requests.post(
“https://www.arcgis.com/sharing/rest/generateToken”,
data={
‘f’: ‘json’,
‘client’: ‘requestip’,
‘expiration’: 60
},
headers={‘Authorization’: f’Bearer {settings.ARCGIS_API_KEY}’}
)
params[‘f’] = ‘json’
params[‘token’] = settings.ARCGIS_API_KEY
response = requests.post(f”{service_url}/execute”, data=params)
result = response.json()
if ‘error’ in result:
raise RuntimeError(f”GP tool error: {result[‘error’][‘message’]}”)
return result
def submit_async_gp_job(service_url: str, params: dict, max_polls=40):
“””
Submit an async geoprocessing job and poll for results.
Pattern: submit → poll → retrieve
“””
params[‘f’] = ‘json’
params[‘token’] = settings.ARCGIS_API_KEY
# Submit
submit_response = requests.post(
f”{service_url}/submitJob”,
data=params
).json()
job_id = submit_response.get(‘jobId’)
if not job_id:
raise RuntimeError(“Job submission failed”)
# Poll
import time
for _ in range(max_polls):
status_response = requests.get(
f”{service_url}/jobs/{job_id}”,
params={‘f’: ‘json’, ‘token’: settings.ARCGIS_API_KEY}
).json()
job_status = status_response.get(‘jobStatus’)
if job_status == ‘esriJobSucceeded’:
# Retrieve results
result_response = requests.get(
f”{service_url}/jobs/{job_id}/results/Output_Features”,
params={‘f’: ‘json’, ‘token’: settings.ARCGIS_API_KEY}
).json()
return result_response
elif job_status in (‘esriJobFailed’, ‘esriJobCancelled’):
raise RuntimeError(f”Job failed: {status_response.get(‘messages’)}”)
time.sleep(3)
raise TimeoutError(“Geoprocessing job timed out after polling”)
Common Errors and How to Fix Them
“GDAL not found”
- Ubuntu: sudo apt-get install gdal-bin libgdal-dev python3-gdal
- Windows: Install OSGeo4W and setGDAL_LIBRARY_PATH in settings.py
- Docker (Alpine): Alpine does not have GDAL packages that work well with the Python GDAL bindings. Usepython:3.10-slim-bookworm (Debian-based) instead. Add to your Dockerfile:
FROM python:3.10-slim-bookworm
RUN apt-get update && apt-get install -y \
gdal-bin \
libgdal-dev \
python3-gdal \
postgresql-client
TokenExpiredError Mid-Analysis
This happens when a long-running analysis outlasts your token lifetime. The fix is to catch it and re-authenticate:
from arcgis.gis import GIS
from arcgis._impl.common._mixins import PropertyMap
def get_gis_with_retry():
try:
gis = get_gis_connection()
# Force a lightweight API call to check if token is still valid
_ = gis.properties
return gis
except Exception:
# Clear the cache and reconnect
cache.delete(‘arcgis_gis_connection’)
return get_gis_connection()
GeoDjango Migration Errors with PostGIS
- “postgis extension not found” — RunCREATE EXTENSION postgis; as a superuser in your database
- “django.db.utils.ProgrammingError: relation does not exist” — You are running spatial queries before runningmigrate. Runpython manage.py migrate first
- “SRID mismatch” — Your geometry data is in a different SRID than your model field. Use.transform(4326) on the geometry before saving
Performance Considerations
Spatial Indexing
PostGIS automatically creates a GIST spatial index when you create a spatial column through GeoDjango. You can verify it:
SELECT indexname, indexdef
FROM pg_indexes
WHERE tablename = ‘analysis_analysislayer’;
For large datasets, make sure you are using spatial filters (__intersects,__within,__distance_lte) in your QuerySets rather than filtering in Python after fetching all rows.
Celery for Long-Running Analysis
Never run ArcGIS analysis inside a synchronous Django view for jobs that take more than 5–10 seconds. Use Celery:
# analysis/tasks.py
from celery import shared_task
from .services import run_buffer_analysis, save_analysis_result_to_db
@shared_task
def run_buffer_task(layer_item_id: str, distance_meters: float, analysis_layer_id: int):
from arcgis.gis import GIS
from django.conf import settings
from .models import AnalysisLayer
gis = GIS(settings.ARCGIS_URL, api_key=settings.ARCGIS_API_KEY)
layer_item = gis.content.get(layer_item_id)
source_layer = AnalysisLayer.objects.get(id=analysis_layer_id)
result = run_buffer_analysis(layer_item, distance_meters)
save_analysis_result_to_db(result, source_layer, distance_meters)
return {‘status’: ‘complete’, ‘layer_id’: analysis_layer_id}
Caching GeoJSON Results
If the same GeoJSON gets requested repeatedly, cache it:
from django.core.cache import cache
import json
def get_cached_geojson(cache_key, queryset_func, timeout=300):
cached = cache.get(cache_key)
if cached:
return cached
result = queryset_func()
cache.set(cache_key, result, timeout=timeout)
return result
Deploying to Production
Checklist
- All ArcGIS credentials must be in environment variables, never in source code
- UseDEBUG=False in production settings
- SetALLOWED_HOSTS explicitly
- Runpython manage.py collectstatic before deploying
- Use Gunicorn as the WSGI server behind Nginx
Example Gunicorn command:
gunicorn arcgis_tool.wsgi:application \
–workers 4 \
–bind 0.0.0.0:8000 \
–timeout 120 # Increase for long analysis jobs
Docker Considerations
Use Debian-based images for GeoDjango, not Alpine. Alpine does not have reliable GDAL packages. A workingDockerfile:
FROM python:3.10-slim-bookworm
RUN apt-get update && apt-get install -y \
gdal-bin libgdal-dev libgeos-dev \
postgresql-client \
&& rm -rf /var/lib/apt/lists/*
WORKDIR /app
COPY requirements.txt .
RUN pip install –no-cache-dir -r requirements.txt
COPY . .
CMD [“gunicorn”, “arcgis_tool.wsgi:application”, “–bind”, “0.0.0.0:8000”]
What You Built and What to Build Next
At this point you have a working stack: Django accepts requests, the ArcGIS API for Python runs analysis against an Esri portal, PostGIS stores the results, and Leaflet.js renders them on a map. Real field teams can use this from any browser.
Natural next steps:
- Add user authentication so field teams have separate accounts and analysis history
- Add support for multi-layer overlay analysis (intersect, union, difference)
- Build a job status endpoint so the front end can poll Celery task progress
- Export analysis results as PDF reports using ReportLab or WeasyPrint
- Add support for uploading shapefiles and converting them to PostGIS layers with GDAL